… is all that matters here!

Posts tagged ‘silk’

New video tutorial – how to make a wet felt picture

As you know if you’ve been following my blog, I love making felt paintings.  I have to say though, my life has been so busy with other projects for a few months, that I haven’t made any for ages.

felt-finished-with-background

Recently though, I was asked to make a video tutorial, so here it is. The pics don’t really capture the depths of the blues at the top of the painting, but I think you get the idea.

I had immense fun getting all my wool and silk rovings and searching through my yarn box for just the right variegated and also dimensional yarns, and then even more joy as the little painting came together.

I’m getting used to filming the process, and even the editing is taking less time – still a.g.e.s. – but I’m getting the hang of it, and the rendering and Handbraking and uploading to YouTube with the tags and what-have-you, so people who are searching for a felt picture tutorial, actually discover it!

My desire was to make an attractive picture that was easy to demonstrate, and also copy if someone wants to – without too many intricate materials or steps.  I may make a more complex picture later, if I get enough interest.  Or I’ll make another one for the love of it, and may even video it as I make it!

Here are some closeups of the details of the simple little Sea Beach picture:

So what next?

I do have a hankering to make another nuno scarf soon though because I want to do some eco-printing on it.  I have some rose leaves in the freezer from Valentine’s Day, waiting to be put to good use. Or should I say second use – the first being the expression of love. Ahh, soppy. 😉

If you’d like to watch the new video, here is a link.  Do let me know what you think, by writing in the comments. ❤


Vintage Kimono finally loves lavender

What do you do when your eco-printing results flop big time?

I’d forgotten just how disappointing that can be.  My latest creative efforts have been very satisfying, so I felt a bit slugged when today’s experiment went south.  In one day, I went from anticipation, to disappointment, to determination, to delight. Here’s how.

I’m in a real creative phase at the moment, and this morning woke up itching to dye something.  I rummaged in one of my cupboards and came across a brown paper bag stuffed to bursting with some old (literally – they’re vintage) linings from kimonos that a friend of mine gave me a couple of years ago to eco-print.

kimono silk.jpg

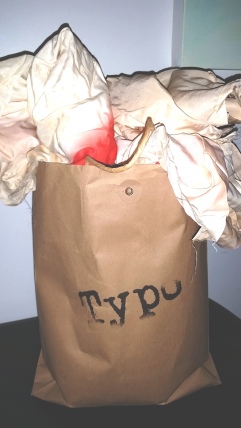
Using one oblong of silk that had once graced the inside of a kimono (and perhaps a geisha’s) sleeve, I set about eco-printing it with some kale slaw mix from Aldi, as I figured all the ingredients in that had potential to give up their dye.  I also threw on some cut red onion and a few lychee skins for good measure.

20170208_095019[1].jpg

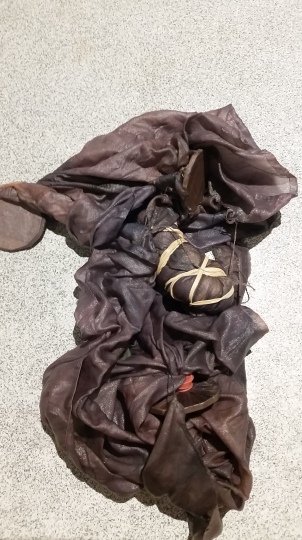
All excited, I wrapped it tightly in a bundle and waited for it to steam.  Well, I didn’t wait, I distracted myself with another project until the timer went off.

20170208_095705[1].jpg

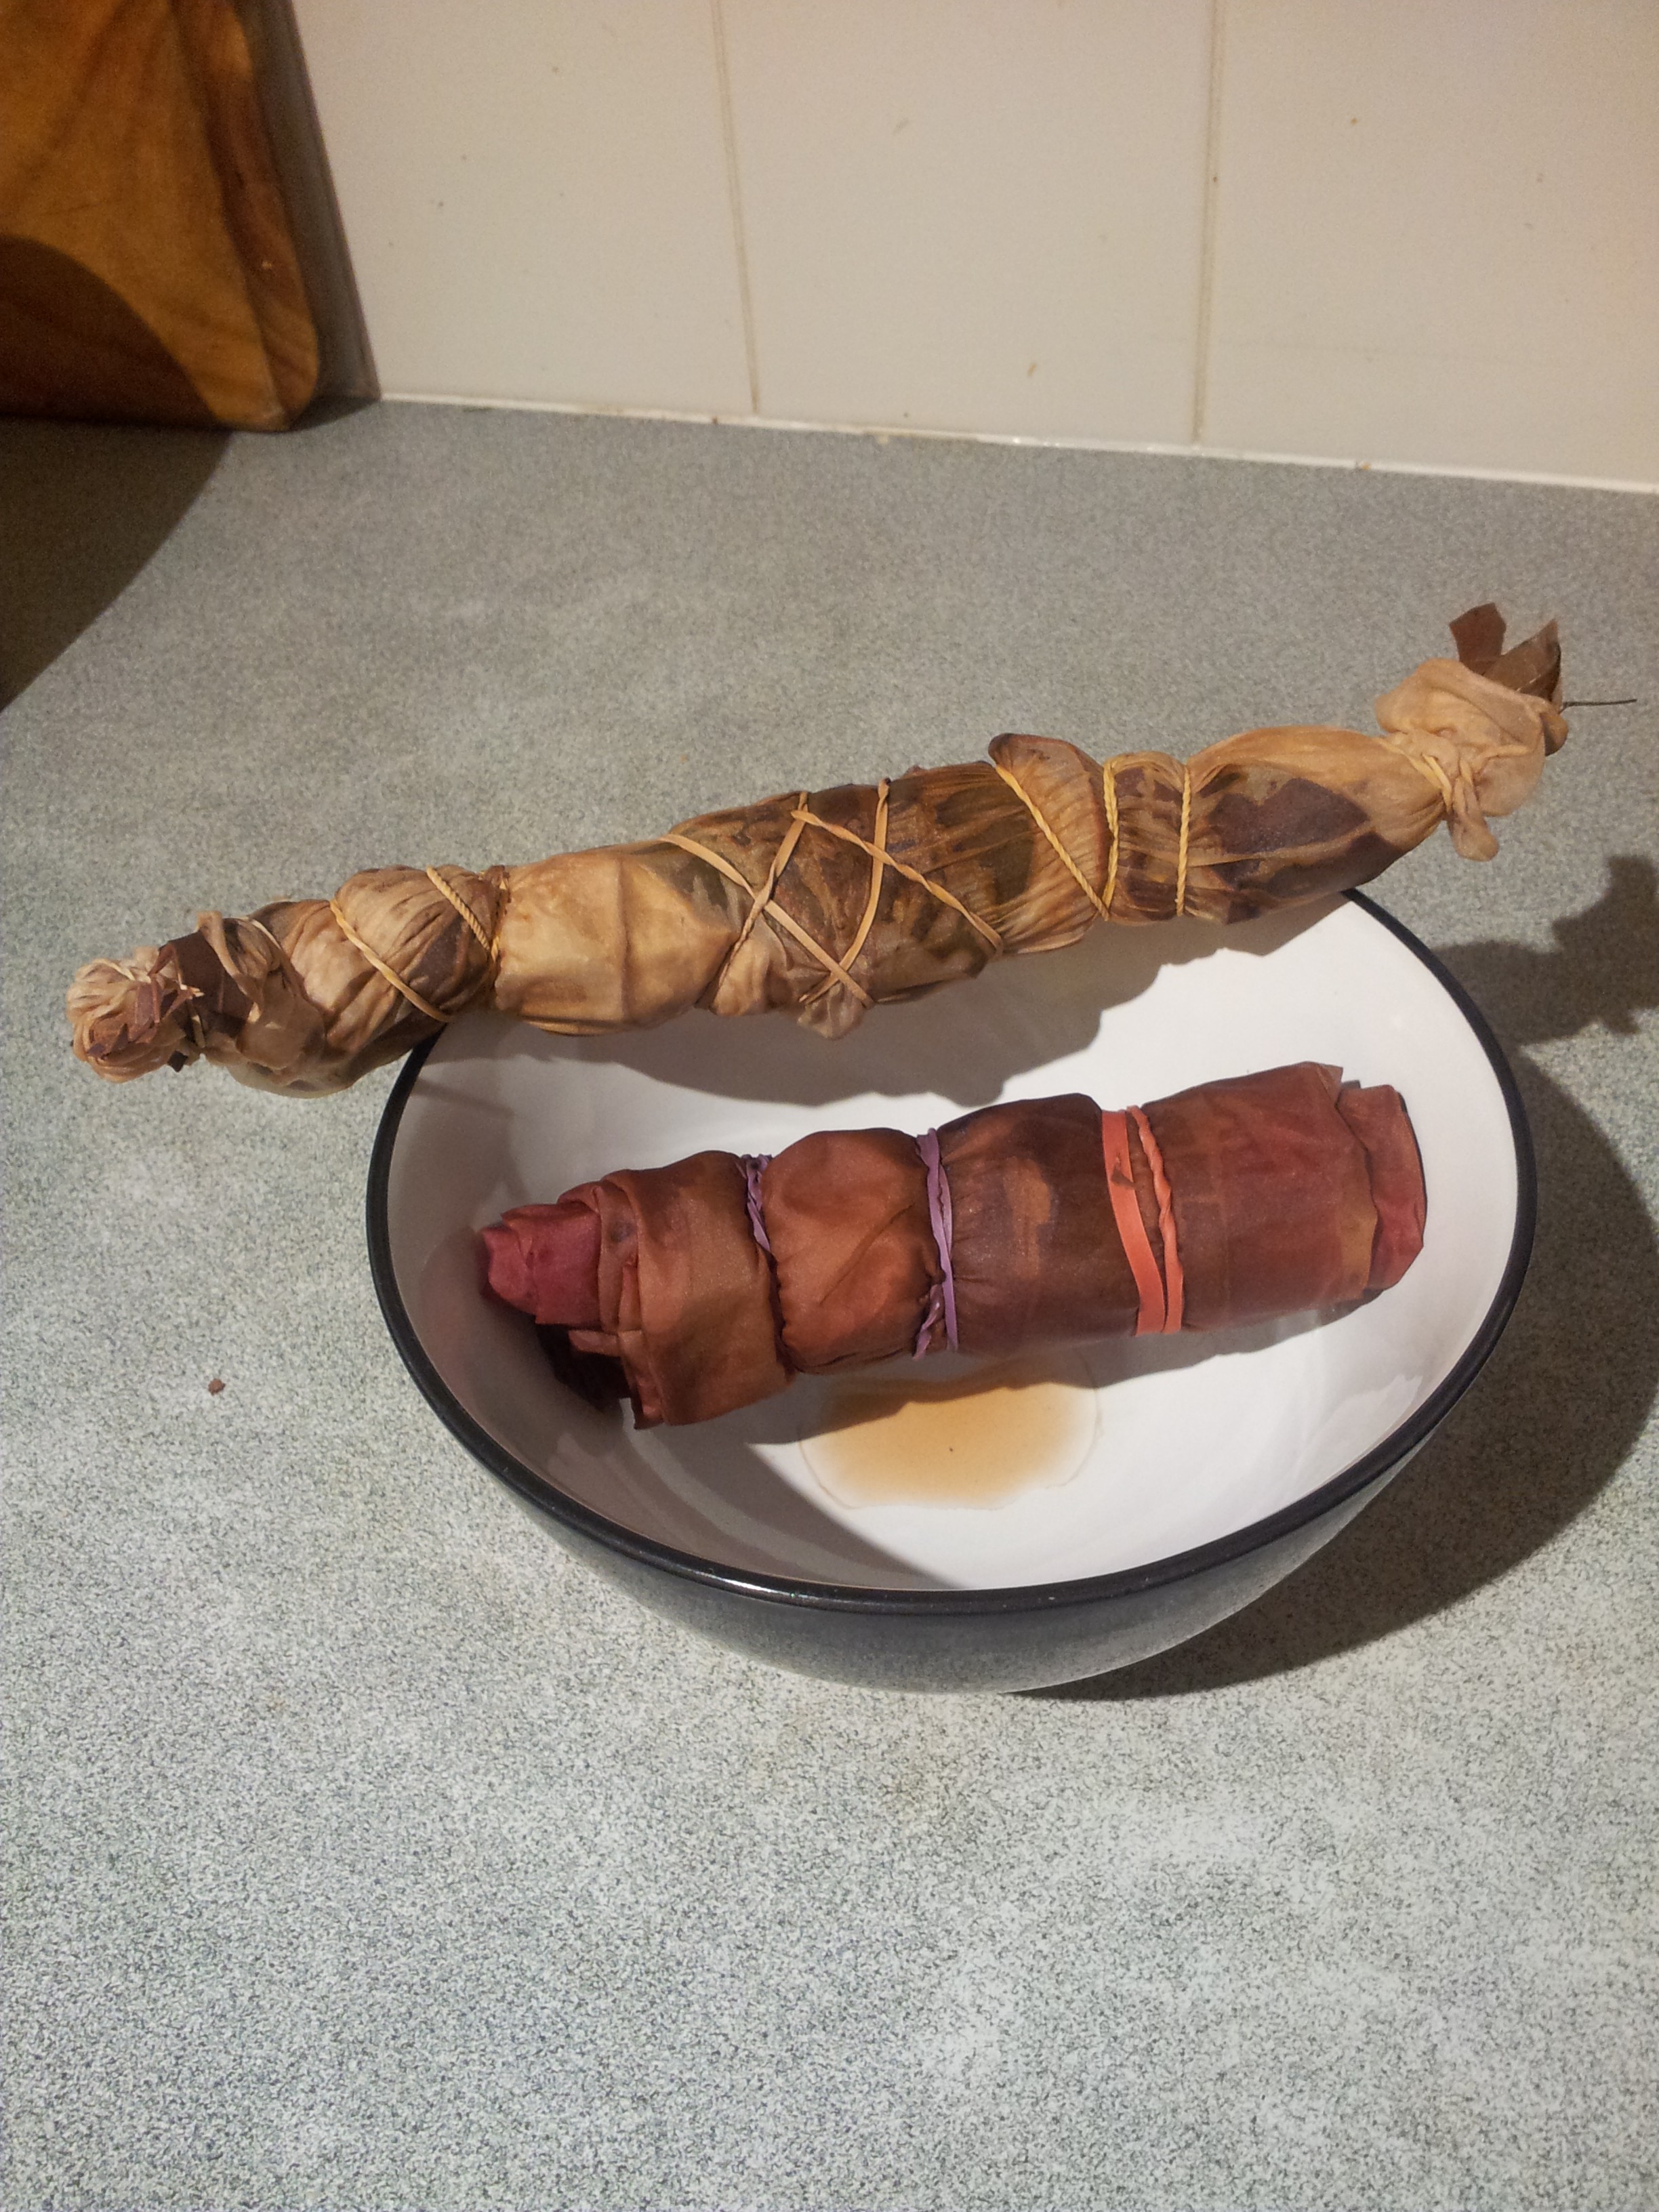
Like a kid in a toy shop, when it was cool enough, I unravelled the string and swept away the damp plant material … only to be massively disappointed.

The kale hadn’t left any marks, the lychees, only an imprint. The only marks given up had come reluctantly from the red cabbage, beetroot and onion.  After hanging the soaking strip out to dry, I was comforted to note a slight oxidation on the lychees, but overall, I had to admit that this wasn’t my most spectacular result.  The strongest part of the print was the smell – reminiscent of vegetable soup.

20170208_111242[1].jpg

As I had to do the weekly shopping, I set off to the shops in town, all the time pondering in the back of my mind how I could do the vintage silk more justice.  Cruising past the vegetables in IGA, my little eye spied a large red cabbage.  Perfect!  I brought it home heavily disguised as family food, then purloined it for a higher purpose. I must admit, knowing my two boys’ (husband and teenage son) taste in brassicas, it wouldn’t be hugely missed.

A few hours later of multi-tasking: dying with preparing the family dinner – which I didn’t think would be a problem with this eco-dye, considering the most toxic chemical I used to shift the dye colour was cooking salt – I eventually brought into life two unique creations.

The first was chicken Mediterranean style cooked with mirepoix, capsicum, passata and Moroccan spices which looked and tasted rather good, if you’ll pardon the self-praise.

The second was the rather gorgeous cabbage-dyed vintage kimono silk.

20170208_2133261

I know, it looks like something I could have dragged out of a river in this photo, but as you’ll see shortly, it dried beautifully.

One amusing result was the queen’s head which imprinted from one of the 50 cent pieces that I ‘shirboried’ before dyeing.  I think the coin must have had a chemical on its surface, because the bright purple image is a lot sharper than the other shades of lavender from the cabbage.  Here it is directly after untying the bundle. Once dried and ironed, I noticed some interesting and unexpected small dark brown oval marks on the fabric.  It occurred to me suddenly that these marks were where the lychee skin had been, and it was possibly tannin from the skin that had highlighted the dye in those areas!

20170208_214038[1].jpg

Finally, here is the result, showing just how beautiful natural dyeing can be, especially when imparted onto a natural material, and in particular, one that has aged as gracefully as the Japanese lady who once wore it.

red-cabbage-kimono

So many eco-tees!

…And lots of other things as well!

Since I wrote my last post, I have bundled, boiled, dried, rinsed, dried and ironed quite a few new eco-printed shirts and tees. All ready for the CWA Easter Art & Craft Twilight Market on 4th April.

Rather than bore you with the details, which are similar as for previous posts, I’ll add a gallery of my latest beautiful nature-painted clothes.

I’ve taken photos of them in the last few moments of sunlight in front of our mini-rainforest – so the colours of the eco-dyed clothes are enhanced by the trees and bushes, and natural light.

Blue and eucalyptus eco dyeing

Blue bundlesOoh, what’s in the bundles?  They’re blue and tightly wrapped.  There’s a bit of brown showing through too …

On Monday, I spent the day catching up on unfinished business.  The business of eco-dyeing.  I’ve had such a sparse time of it over the last few months because of work commitments that I was pretty damn stir crazy by the time I’d gathered my leaves and excitedly brought home my first bunch of Eucalyptus Cinerea from the florists.

The other leaves were collected from my driveway and garden, blown roughly to the ground by cyclone Marcia that made her way through our town a couple of weeks ago.  Luckily, Marcia had spent her energy except for gallons of rain that she dumped on us on her way down from Yepoon where she’d crossed from the ocean to the land.

Our normally fairly dry creek burst its banks due to the constant downpour and king tides that had something to do with keeping the river backed up with water for a day or two.  Here’s one of the local road on the first morning …

159

As you can imagine, lots of children were hugely disappointed at not being able to attend school – along with adults who also couldn’t make work because the roads were cut off…

Disappointed.  Sure.  *Smiles*.

Anyway, while cyclone Marcia brought devastation to homes and crops north of here, along with flooding to the south, she did kindly provide me with windfall leaves that I eagerly collected for my dye pot.

I had two second-hand cotton tee shirts that I’d pre-mordanted a few months ago and kept until I had the time to dye them.

Sunday was that day.

I was so eager to get the bundles into the pot that I forgot to photograph the layout of the leaves.  Sorry about that.

Anyhow, here’s the reveal, with a selection of photos. I love the shade of blue imparted by the natural Aquarelle botanic liquid dye.

After they’d dried, I rinsed them in water to wash off remnants of leaves and mordant.  Then ironed them.  Then hung them out to dry.  They have lost some of their depth of colour, but I have to say, I really love them and am pleased at how they’ve turned out.

I also now have two eco-dyed silk scarves using the same eco colour palette.  Here they are side by side.  What do you think?

Two blue scarves with eucI love the tie die lines from the bundling string on the bottom scarf.  I also love the depth of colour from the leaves on the other scarf.

My next project was two un-mordanted cotton items that I stuffed with leaves, tied and boiled in turmeric water.  That produced an interesting result. But more on that next blog post.

Dyeing to show you Tee and Scarf

After about a year of drought in the creative department, I am happy to say I feel a sense of surge of passion for dyeing and felting again!  Here is a sneak peek of two eco-dyeing projects from yesterday. They’re still drying and will be washed and re-dryed to make sure there’s no mordant left before wearing, but I wanted to show you the results.

I used saved onion skins and various eucalyptus leaves from my garden.

This one is the silk scarf, still wet and just unbundled. The reds of the onion skins are showing well!

This one is the silk scarf, still wet and just unbundled. The reds of the onion skins are showing well!

Tee shirt onion and euc

This one is a close up of the tee shirt – showing how well the eucalyptus leaves and onion skins have developed. I also love how there are dark patches with white lines, from the string I tied the bundle with!

Image

Eco Dyed Australian merino wool and silks

Eco Dyed Australian merino wool and silks

Hand Eco Dyed Australian Merino and Silks.

Eco-dyeing silk with alum, tea, iron

Today’s experiment took me beyond my comfort zone of familiar eucalyptus.

Scarf 1

Using the golden eucalypt-dyed silk scarf from yesterday’s experiment which turned out very similar to my first attempt, I decided to over-print with some leaves I had on hand.

First of all, I dipped the scarf in an alum solution and ironed it dry.

To this I added tea leaves and kale leaf pieces on half of the scarf.  I folded it and rolled it tightly on a tea tree twig. I tied it tightly with twine (tighter than yesterday  in the hope that if any leaf prints came out, they’d be in better contact with the silk).

Scarf 2

For the second silk scarf, I scattered roibus tea leaves and black tea leaves from my cupboard, and some fresh sage leaves from the herb garden.  I folded this in half and half again several times until I had a small square that I secured with bull-dog clips.

The dye pot

Using an enamel bowl (kindly donated by my lovely neighbour), I boiled 4 teabags and some rusty iron nails, as I wanted to produce a dark brown/black.  For good measure, I added what was left of the alum solution from Scarf 1.

I stood a rusty mozzie (mosquito) coil holder in the pot and put Scarf 1 on top.  I immersed Scarf 2 into the dye liquid.

Black dye pot

Covered enamel dye bath

Covered enamel dye bath

Covering the pot with aluminium foil, I boiled it for a total of 65 minutes.

Then I took them out to cool and at the moment they are hanging up drying.

Two bundles drying in sink

Two bundles drying in sink

I’ll post the results tomorrow.

Results from second eco-dyeing experiment

After a fair amount of patience, I unwrapped the two bundles from yesterday’s eco-printing experiment.

Bundle 1 – the silk scarf bundled with eucalyptus leaves produced a nice golden scarf with darker gold leaf prints.  And would you believe? I forgot to photograph it! Sorry.

However, as the result was similar to my first scarf, I decided to use it in today’s experiment, which I’ll post next.

Bundle 2 – the previously dyed pink/purple tie-dyed piece of silk which reminded me too much of Barbie – that I immersed in the dye bath, came out with some lovely variations of golden overlaying the pink and purple, muting those colours nicely.  I photographed this one and it looks like this:

Pink purple dyed silk overdyed in eucalyptus leaf/bark dye bath

Pink purple dyed silk overdyed in eucalyptus leaf/bark dye bath

I love the colours now, and will probably hem this piece and use as a scarf.  Of course I could turn it into a simple camisole top but I’m not sure if that will overstretch my sewing gene beyond it’s capacity.

My next post will cover today’s experiment with tea, iron and alum mordants.

Second attempt at eco-printing

Eucalyptus leavesToday’s experiment:

I am using dried eucalyptus leaves which were blown onto the garden as small branches snapped off last week in the wind.  Over the week, in the hot dry weather, the leaves dried.  It rained last night, so they were a bit soft, and I decided to try these. This is different to my first experiment where I used fresh leaves.

Bundle 1: is a silk scarf with the leaves and buds rolled up into a bundle inside of the wetted scarf, tied with elastic bands, and on top of a metal grater which is sitting in the dye bath (which I used in the first experiment – vinegar, water and concentration of dye extracted from eucalyptus bark and leaves).

Leaves laid out on damp silk scarf, ready to be rolled into a bundle.

Leaves laid out on damp silk scarf, ready to be rolled into a bundle.

Bundle 2: The second piece that I have put into this batch is a square of silk that I had pre-dyed with shop-bought dyes in pinks and lavender – using a tie-dye technique, which leaves some of the silk un-dyed.

I wasn’t too keen on the pinks so I wet this scarf, placed some of the dried leaves onto it, folded it and then rolled it and tied in a bundle with elastic bands.

This one I set inside the grater, in the dye liquid (using the grater mainly to keep the bundle in the water, and also to act as a ledge to put the first bundle for steaming).  I am not sure if the grater is made of aluminium or other metal, but this may also act as a mordant and produce a change in colour to the immersed bundle, apart from the expected honey  gold as from the first batch.

ANTICIPATED RESULTS:

According to India Flint in her book: Eco Colour, steaming eucalyptus leaves in silk will give a print from the leaves onto the fabric as the leaves give up their dye.

The tighter the bundle, the better the leaf-print.

Bundle 1 – steamed:

I am not sure if the bundle is tied tightly enough.

After the first 30 minutes, there was a faint green hue, but not much result, so I dipped the bundle briefly in the dye bath, in the hope that the acid mordant would assist the release of the colours.  Then put it back to steam.  I also put a bowl on top of the pan lid, to keep more steam inside.

I am leaving the bundle in for another 60 minutes after which time I will check again.

Bundle 2 – immersed in the pre-used dye bath

As I am dyeing over an existing blend of colours, I am anticipating a variety of shades.

Eucalyptus has the ability to give up to four different shades/colours from four consecutive uses of a dye bath, depending on many variables which include:
– the type of eucalyptus
– any mordant used
– the type of pot used (co-mordant), or even the grater or other metal added
– how many times the dye bath has been used before.
– how long the bundle is boiled.  (Eucalyptus is best boiled or steamed as it needs higher temperatures to release the colours from its thick leaves.  Many other leaves require gentler heating – and some work better if frozen first, then gently heated.)

As you can see, unlike using shop bought chemical dyes, this is a much less accurate way to obtain colour.  But that is part of the fun!

Apparently it is better to  cool the bundle down before unwrapping, then to dry it before rinsing as this helps the dye to fix better.

I removed the bundles from dye-bath after total of 90 minutes.

Bundles removed from dye bath.  Reddish one was boiled, browny one was steamed.

Bundles removed from dye bath. Reddish one was boiled, browny one was steamed.

Time will tell as to the actual results.

Groovy purple hat

Me in purple hat with glasses!  I said in my last post that I’ve been asked to make a felt hat for a Christmas present. The lady wanted purples, maroons and a bit of black.

So here it is – You can see the silk hankies shining through – and the mottled colours blending together.

I’m very happy with how it turned out and want to make one for myself next!

In the next post I’ll diarise the actual process for anyone interested.

If you want to contact me about a commission or any of my felt scarves and other felty things, please contact me via www.aannshajones.com.au

Salty tales from Bali Hai on Sunday

After a break from cruising of nearly 30 years, we are sailing to the Indonesian Islands on our yacht Bali Hai

SV Acheron

A Mediterranean Odyssey

ocean-pilgrim: Life on Water

Life in the Med, on Intention

esothemes

Reflections, revelations and proposals esoteric: Themes to elucidate the depths of human potential.

BeautyBeyondBones

Because we’re all recovering from something.

Open the Door to Your Inner World

Access: Transformational Energy, Guidance, Creativity, Life Purpose

The Procrastinator Dyer's Diary

A Journal of Observations

Beesybee fiber's Blog

Life in West Marin seen through the eye of a needle

Principally felt

experiments in life, decorative felt, nuno, knit felt and mosaic

Obovate Designs™

My dabbling and exploration in contact printing, natural dyeing, and soap making

nancybrownstudio

murals, textiles, ceramics, screenprints, festivals, community

THREADBORNE

Fibre Art, Eco Printing, Natural Dyeing, Book Arts

vintage country style

my move to countryside and planning a crafts business

MarmaladeRose

... is all that matters here!

Hearts Landscapes

... is all that matters here!

Colour Cottage

little house in a field

dedepuppets

dada inspired hand puppets

The Blog of Knitted Fog

art, life and stuff